Building Your Website with Sprocket Rocket
Welcome to Sprocket Rocket! You've taken the first step by installing a Sprocket Rocket theme on HubSpot. Wondering what's next? This guide is designed to help you navigate the process of building your website, from the initial setup to the launch.
Before You Begin
If you're planning to use the Sprocket Rocket App, it's essential to familiarize yourself with it first. Please take a moment to read through the First Steps guide and then return to this guide.
Setting your active theme
You can set an active theme to display that theme's pages as the default option for newly created pages.
-
Navigate to your content:
- Website Pages: In your HubSpot account, navigate to Marketing > Website > Website Pages.
- Landing Pages: In your HubSpot account, navigate to Marketing > Landing Pages.
- In the top right, click the Create dropdown menu and select Website page or Landing page.
- In the dialog box, enter a page name, then click Create page.
- On the theme selection screen, search for Sprocket Rocket.
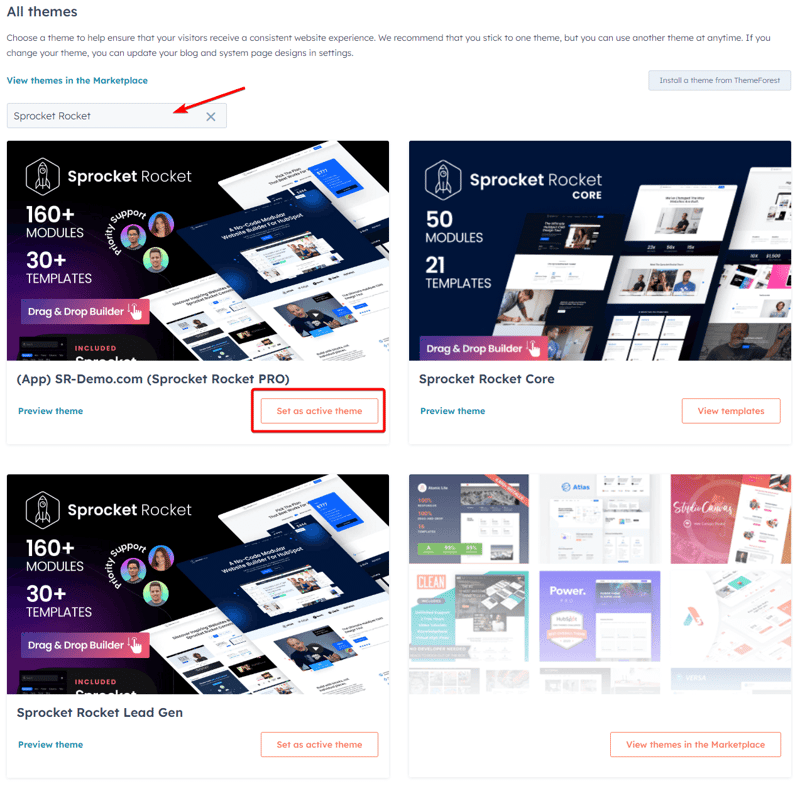
After you set a theme, you'll be brought to the template selection screen each time you create a new page; here, you can choose a starting point for your website. You might only see one template available initially, SR Page, a blank template designed for you to customize from scratch. To expand your options, install additional templates through the Sprocket Rocket App.
At this stage, go ahead and select SR Page as your template. When you enter the editor, the page is blank – this is your canvas to create on. The next step is configuring your theme settings and establishing your global header and footer. Please refer to the following two guides to set these up; once you have completed these initial setups, you can return to this guide.
Building pages
Once you've selected and customized a theme or template, you can use it to build website pages. In the content editor, you can customize your content with images, videos, custom fonts, or other files you’ve uploaded to HubSpot.
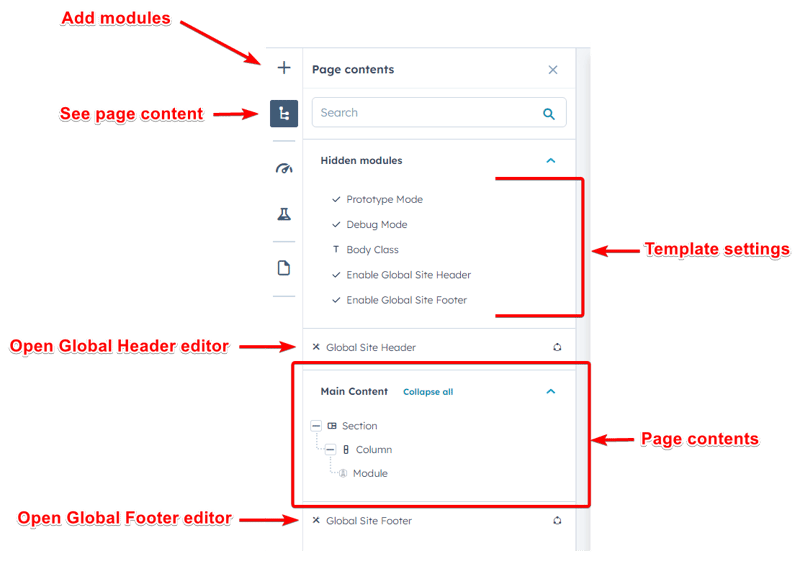
To add modules, click the plus icon in the sidebar.
To view the content of the page, select the site tree icon. This will allow you to observe all the modules on the page, edit the global header and footer, and adjust the template settings.
- Prototype Mode: This mode removes all colors and images, enabling you to concentrate solely on the layout structure.
- Debug Mode: This mode highlights rows and columns with colors and padding to help you visualize the layout more clearly.
- Body Class: Here, you can add a class to the body element of the current page for specific styling needs.
- Enable Global Site Header: Uncheck this option to disable the global site footer for this page.
- Enable Global Site Footer: Uncheck this option to disable the global site footer for this page.
Blog Templates
Please refer to this guide to set up your blog templates on Sprocket Rocket.
System Templates
Please refer to this guide to set up your system templates on Sprocket Rocket.
Subscription Templates
Please refer to this guide to set up your subscription templates on Sprocket Rocket.
Customizing Sprocket Rocket
Customizing Sprocket Rocket allows for a tailored website experience that reflects your brand's identity.
Clone and Extend Modules
- Find the Sprocket Rocket module you wish to customize, right-click, and select 'Clone'.
- Rename and save the cloned module, then make your desired customizations within the module editor.
- You can also sync custom modules into the Sprocket Rocket App.
Add Custom CSS
For in-depth styling changes, add custom CSS to the 'custom-styles.css' files
- In your HubSpot account, navigate to Marketing > Files and Templates > Design Tools.
- Next, navigate to your Sprocket Rocket theme.
- Create a CSS file in the css folder called custom-styles.css
- Any CSS added to this file will be included on every page of your site.
Adding Animations
Enhance the visual appeal of your website by incorporating animations using the SR Animations module.
- To add animations to your page, add the SR Animations module.
- Select the type of animation you want to apply from the module's settings and configure it as needed.
- You can add classes to modules to help target individual modules.
Taking your website live
Before taking your website live, conducting a thorough review and testing of your content is vital to guarantee a seamless and polished debut.
Content Review: Verify the accuracy of the text, ensure images are relevant and high quality, and all links and contact information are correct.
Site Testing:
- Test for broken links.
- Confirm that forms are correctly submitted.
- Check the site's responsiveness on different devices.
Add Domain: Complete the launch process by connecting a custom domain. Link your website's domain to HubSpot, then update your DNS records with your DNS provider.